
Add a Vendor
Walks through how to add a new vendor.
Updated November 21, 2025
This guide shows you how to add a vendor using the built-in website extractor, review the pre-filled details, choose whether the vendor is private to you or shared with your organization, and save it to your Favorites.
Short Video
Guide to Adding a Vendor
Step 1: Start the Process
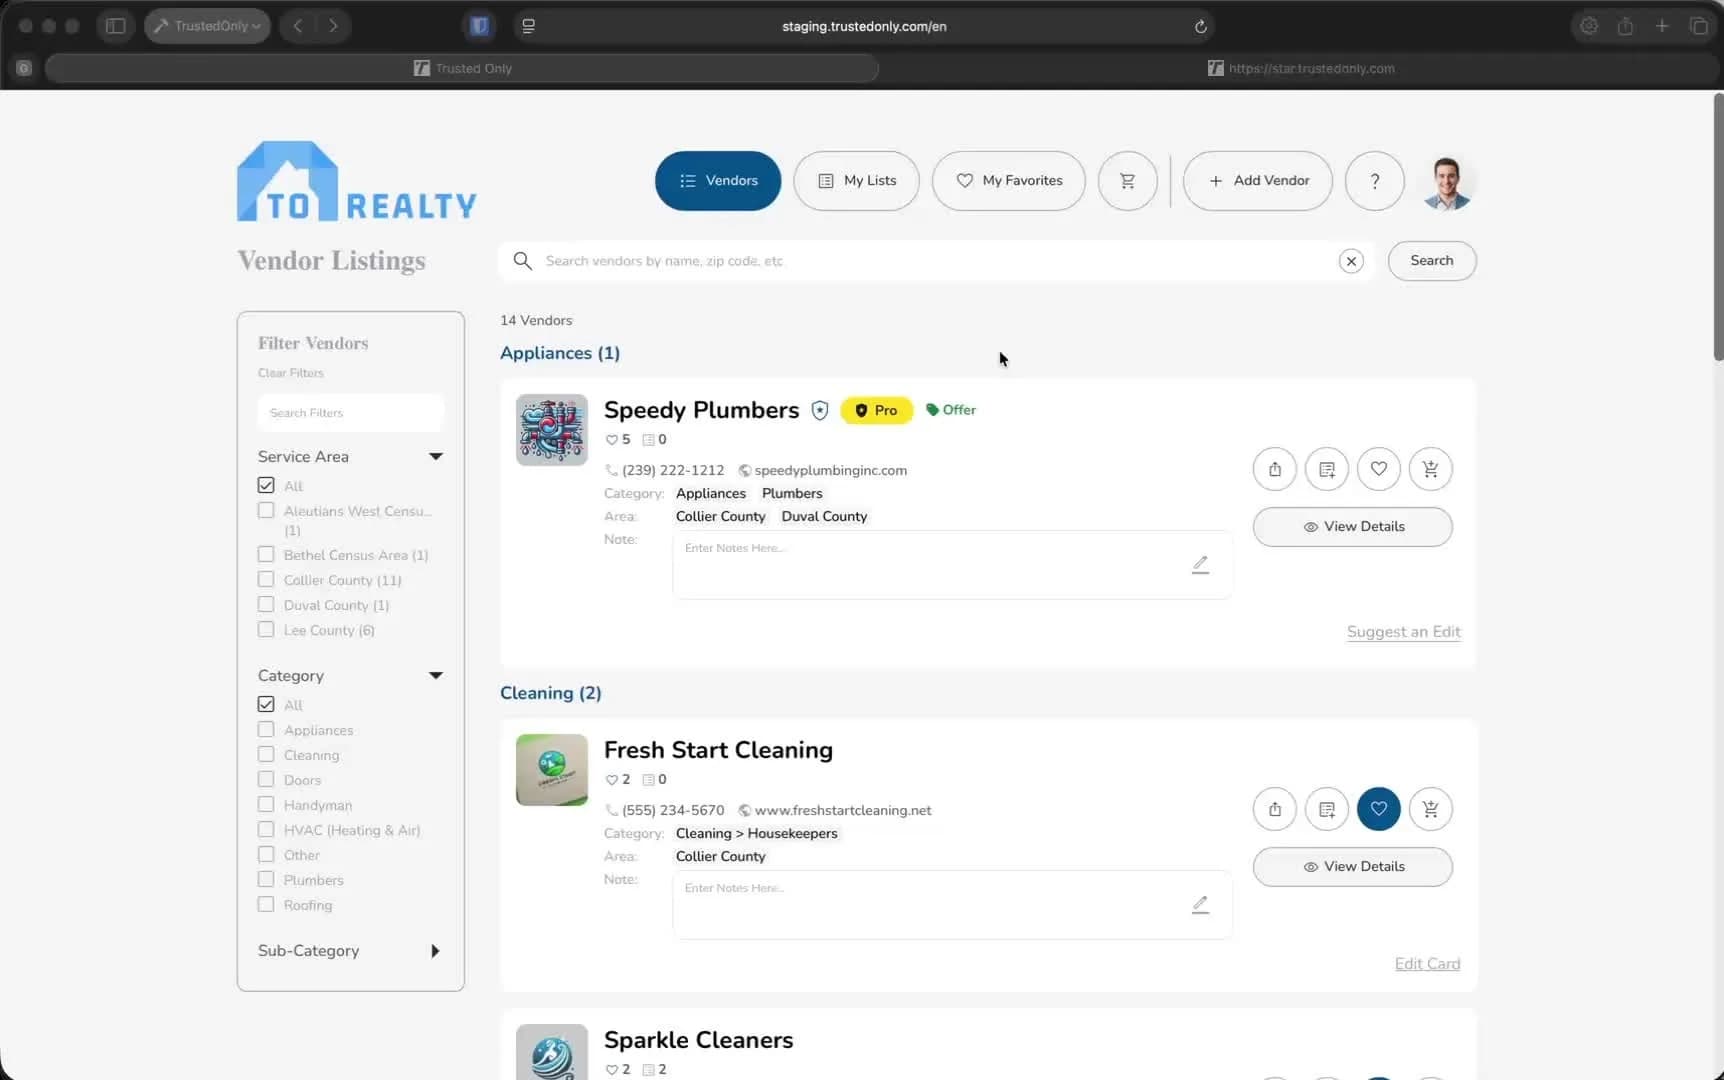
Click on the Add Vendor button.
Choose the Add Vendor Myself option.
Step 2: Input Vendor URL
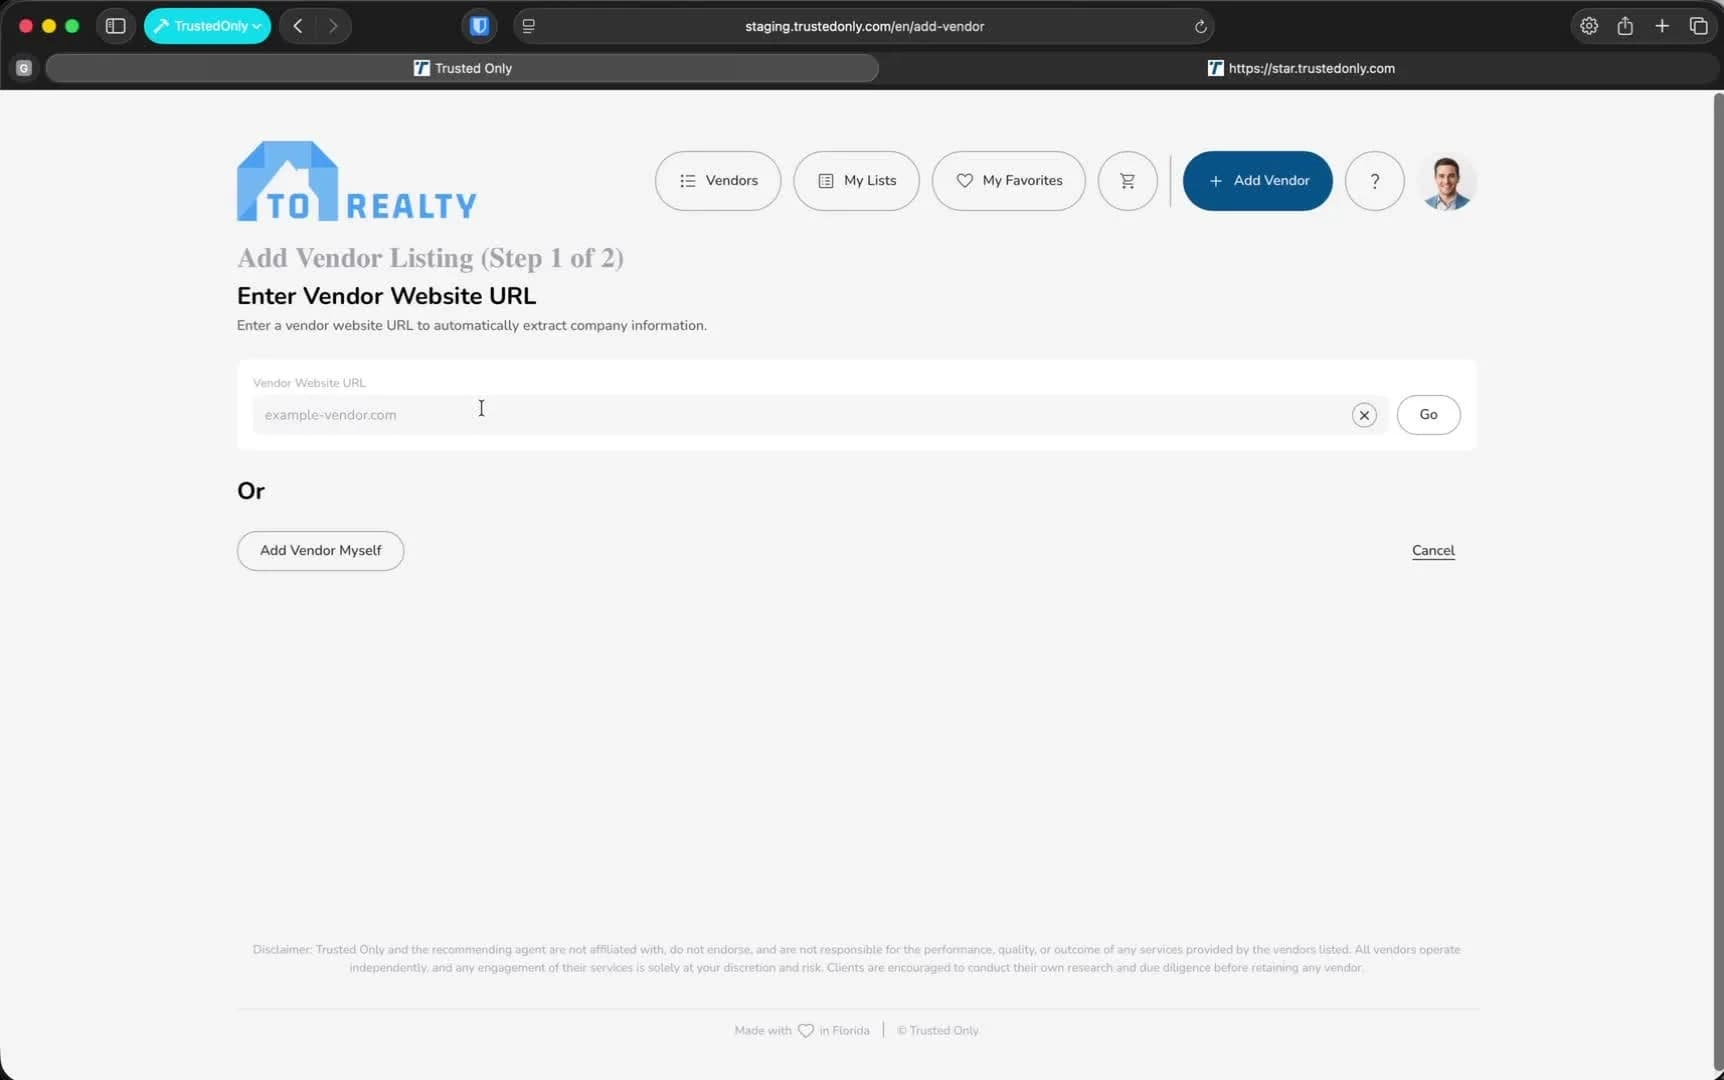
Enter the vendor's URL and click Go.
Or tap the "Add Vendor Myself" if you don't have a URL for the vendor.
The tool will extract information from the website.
Step 3: Review Pre-Populated Form
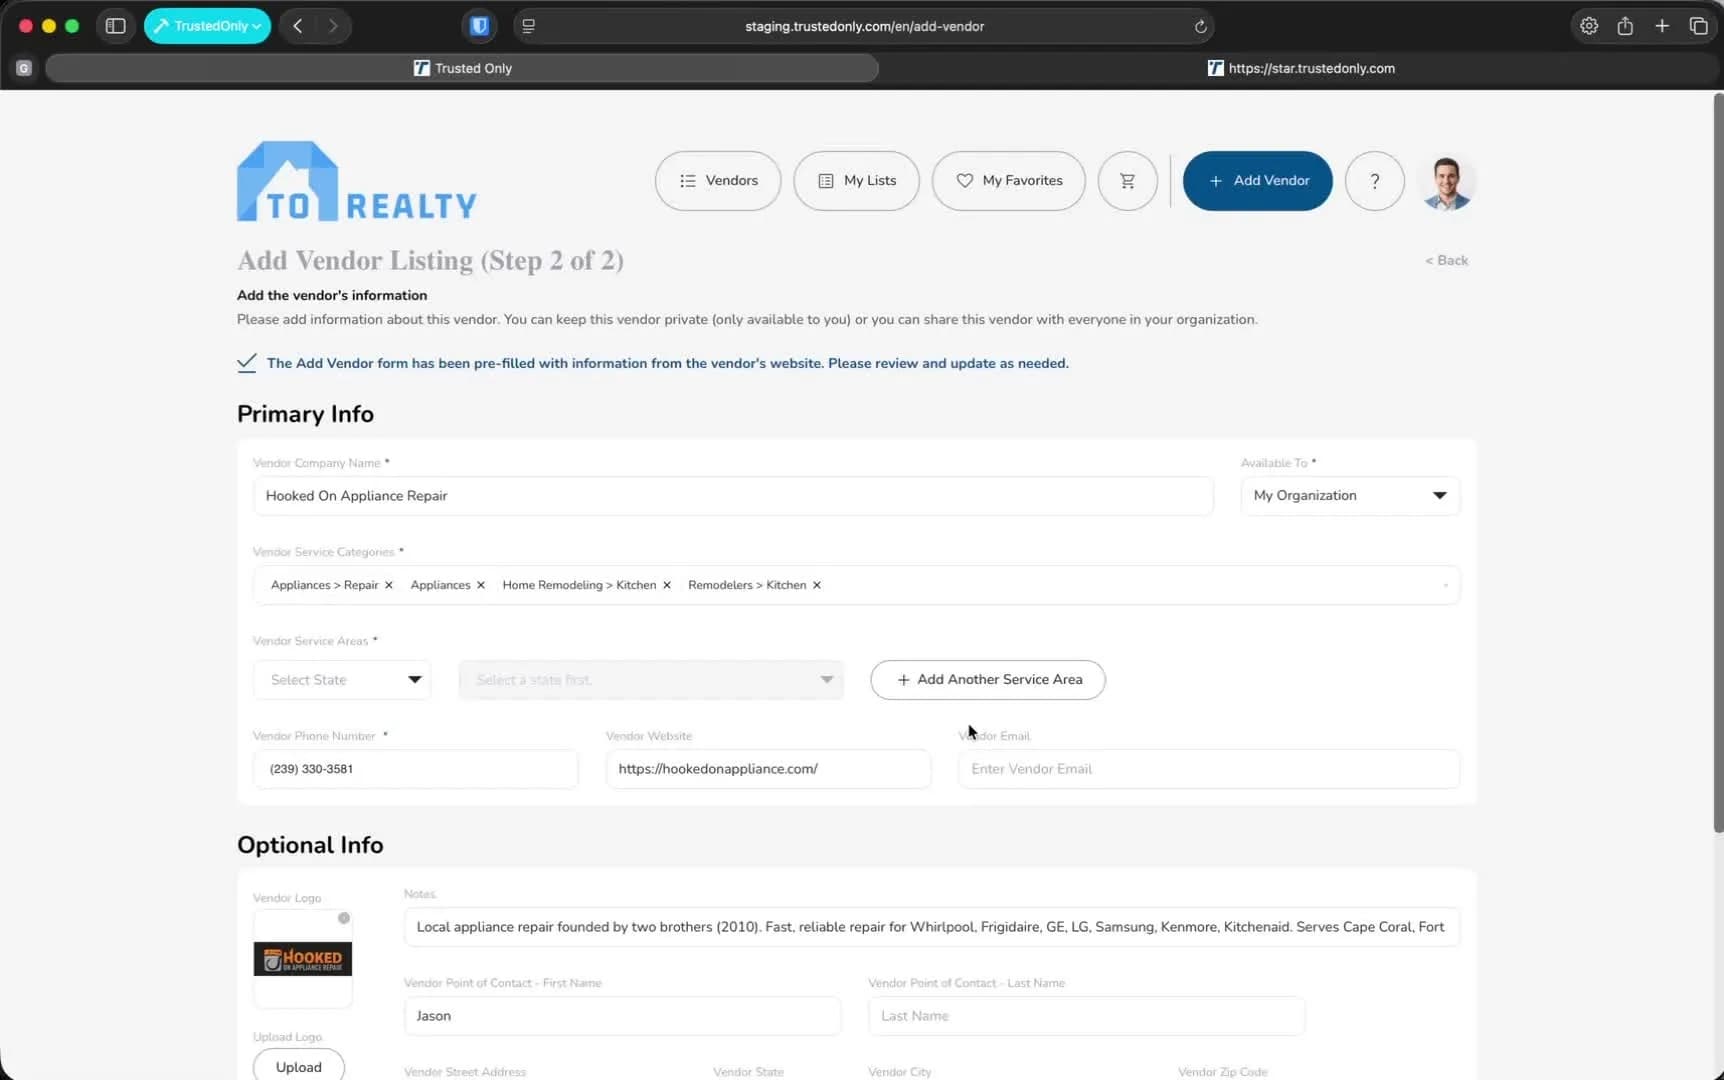
The Add Vendor form will be pre-populated with extracted information.
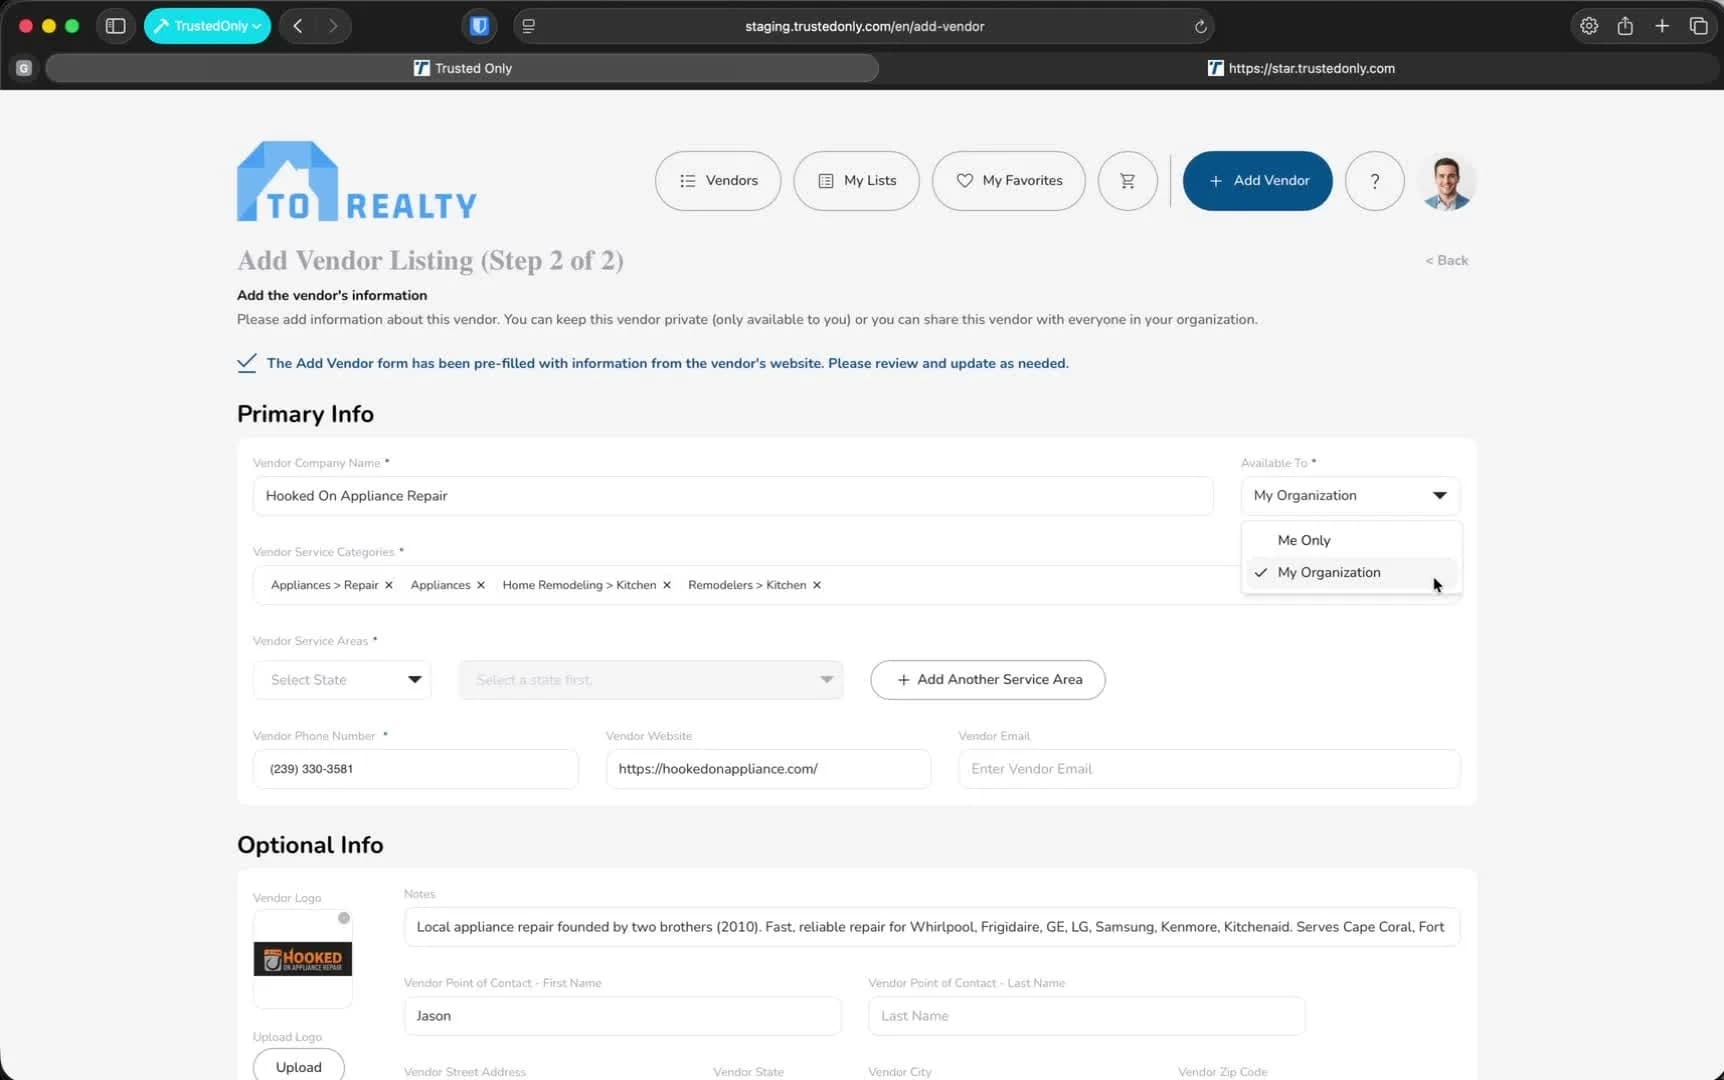
Pay attention to the available to option:
Me only: Vendor is private and only available to you.
My organization: Vendor is shared and available to everyone in your organization.
Step 4: Edit Information
Review the pre-populated information for accuracy.
Add any missing details, such as the state (e.g., Florida) and county (e.g., Lee County).
Fields with a "*" are required. All other fields are optional.
Step 5: Save the Vendor
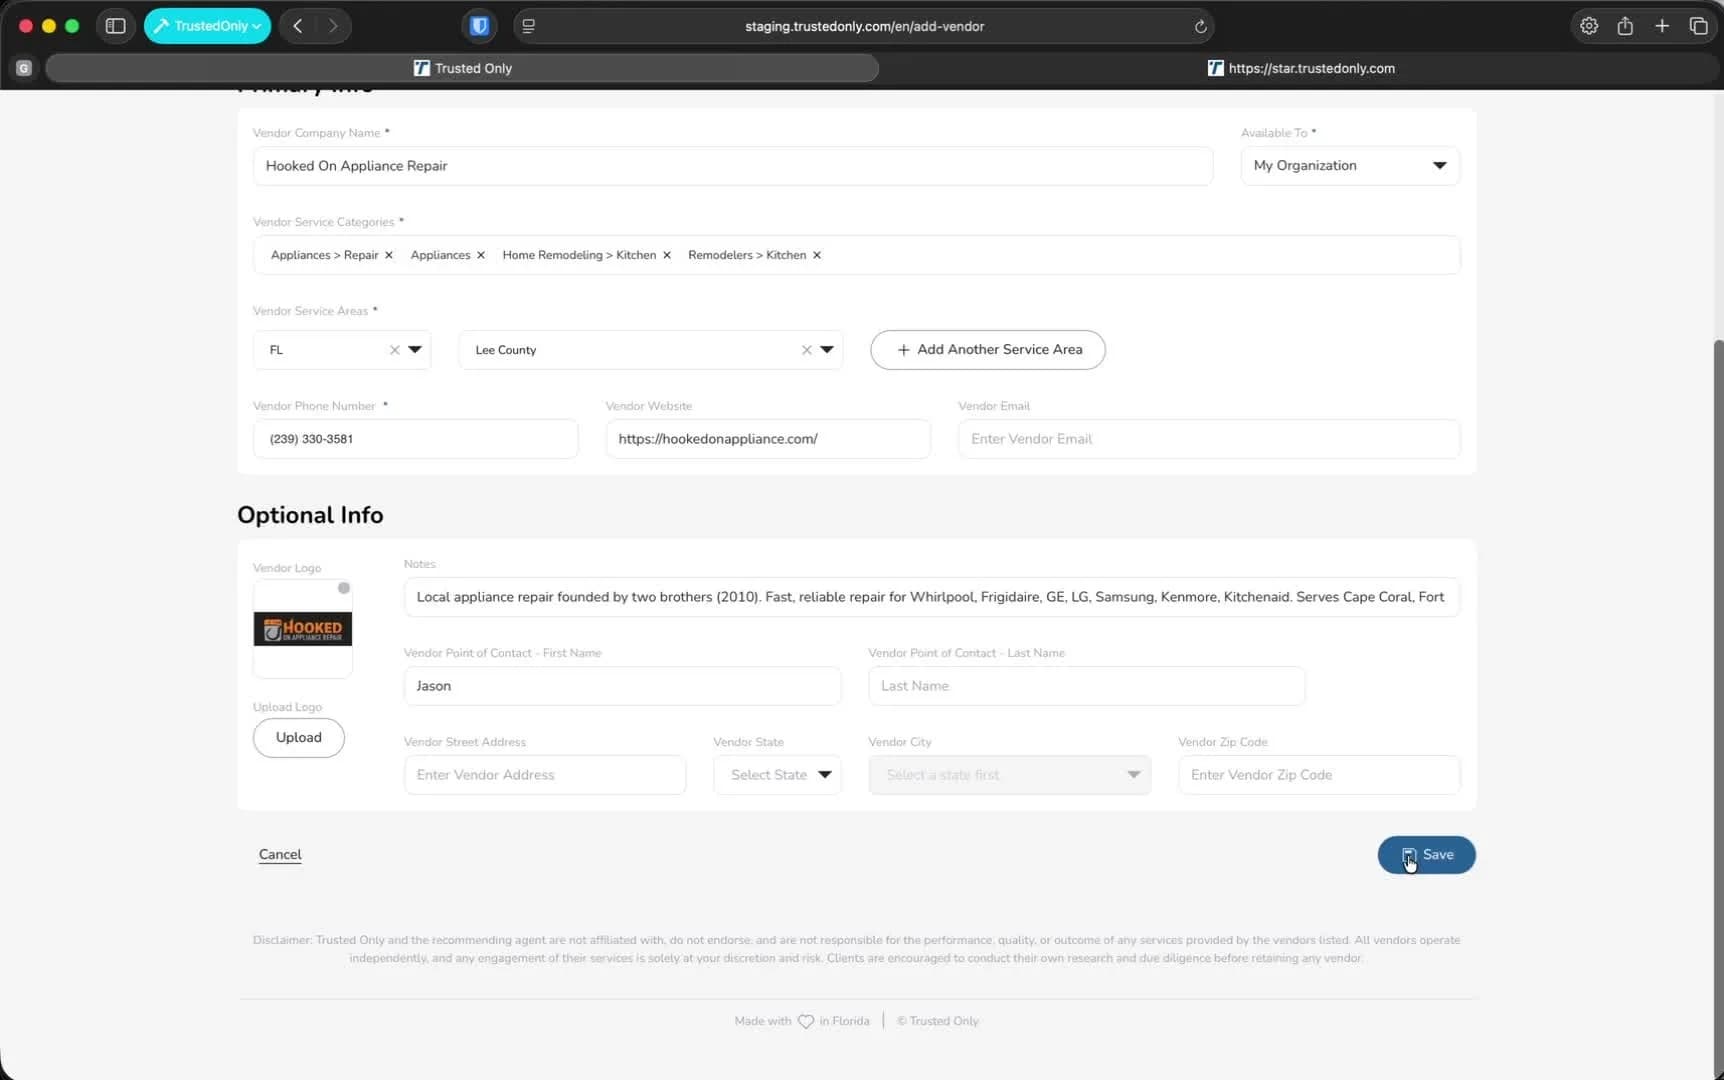
Click Save to add the vendor.
The newly added vendor will appear in the My Favorites section.
Step 6: Confirmation and View in "My Favorites"
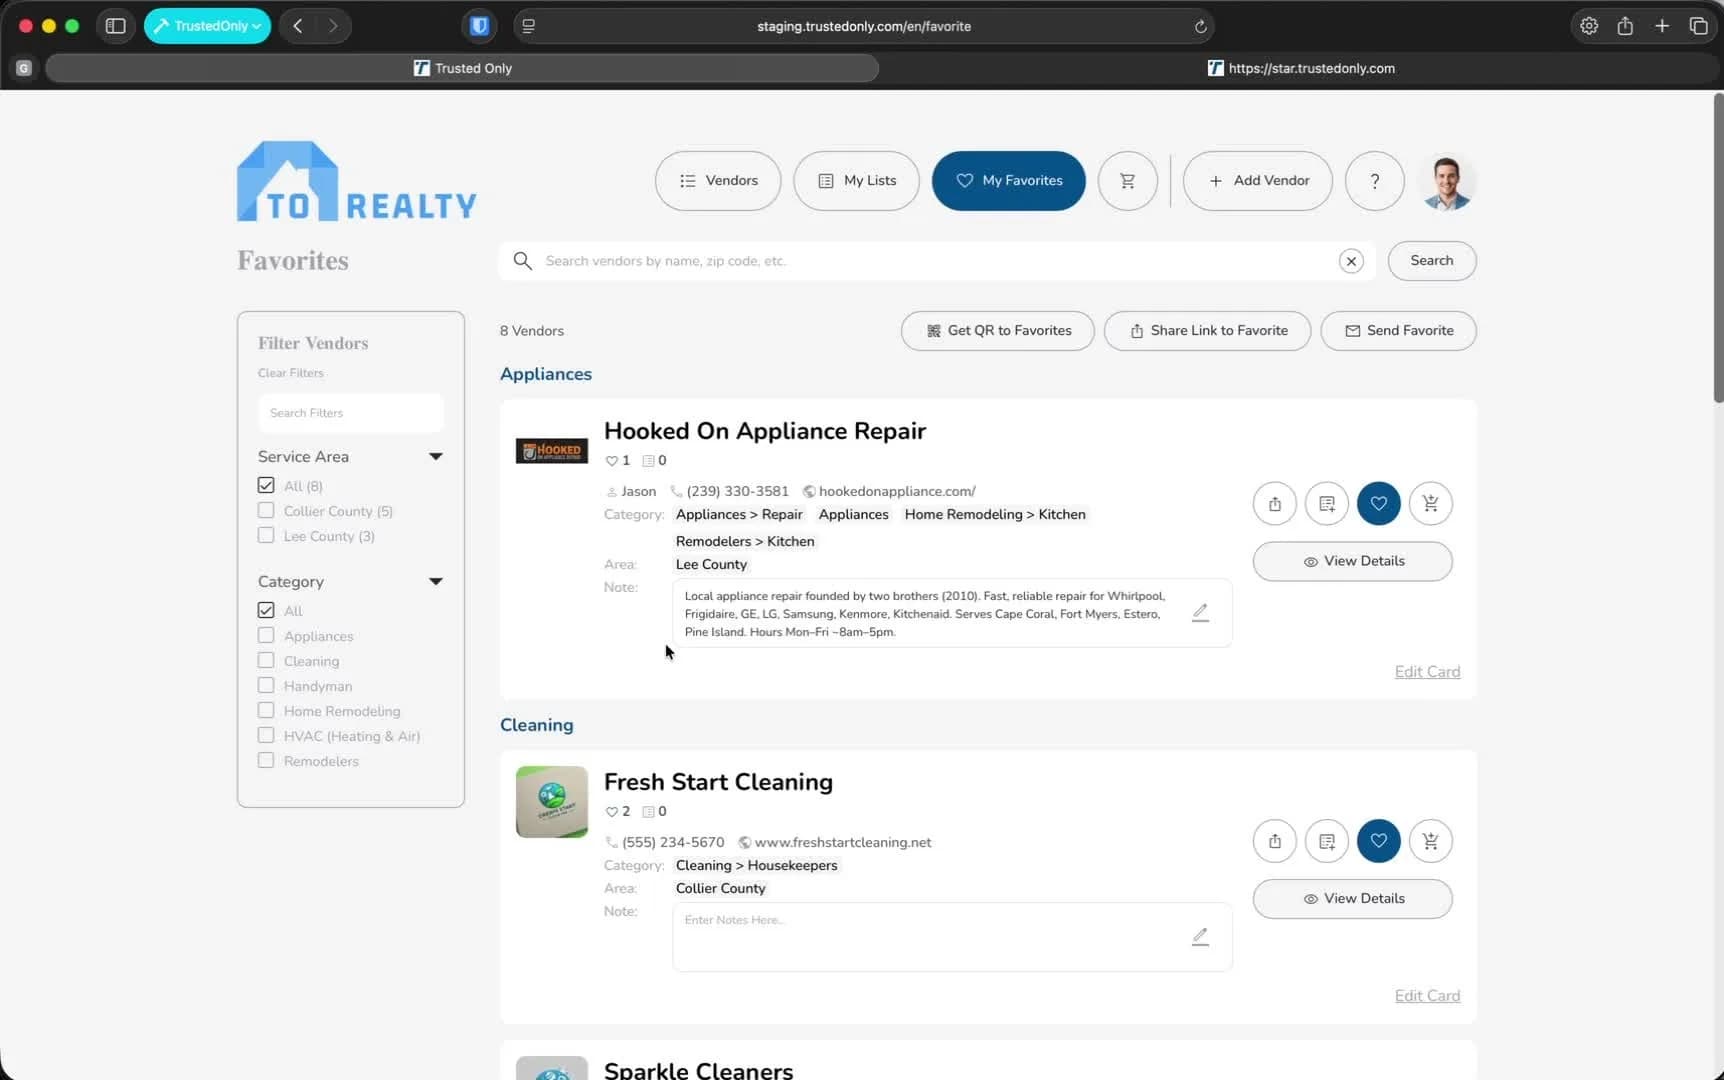
Verify that the vendor (e.g., Hooked on Appliance Repair) is now listed in the My Favorites" section.
Was this article helpful?
If you still need help, our support team is ready.