
Creating Custom Lists (Pro)
Organize vendors into multiple named lists by client type, property type, or purpose.
Updated October 21, 2025
This feature is only available for Pro Tier users.
This article outlines the steps to effectively use the My Lists feature for managing vendor lists, including creating, sharing, and viewing lists.
Key Steps
1. Accessing My Lists
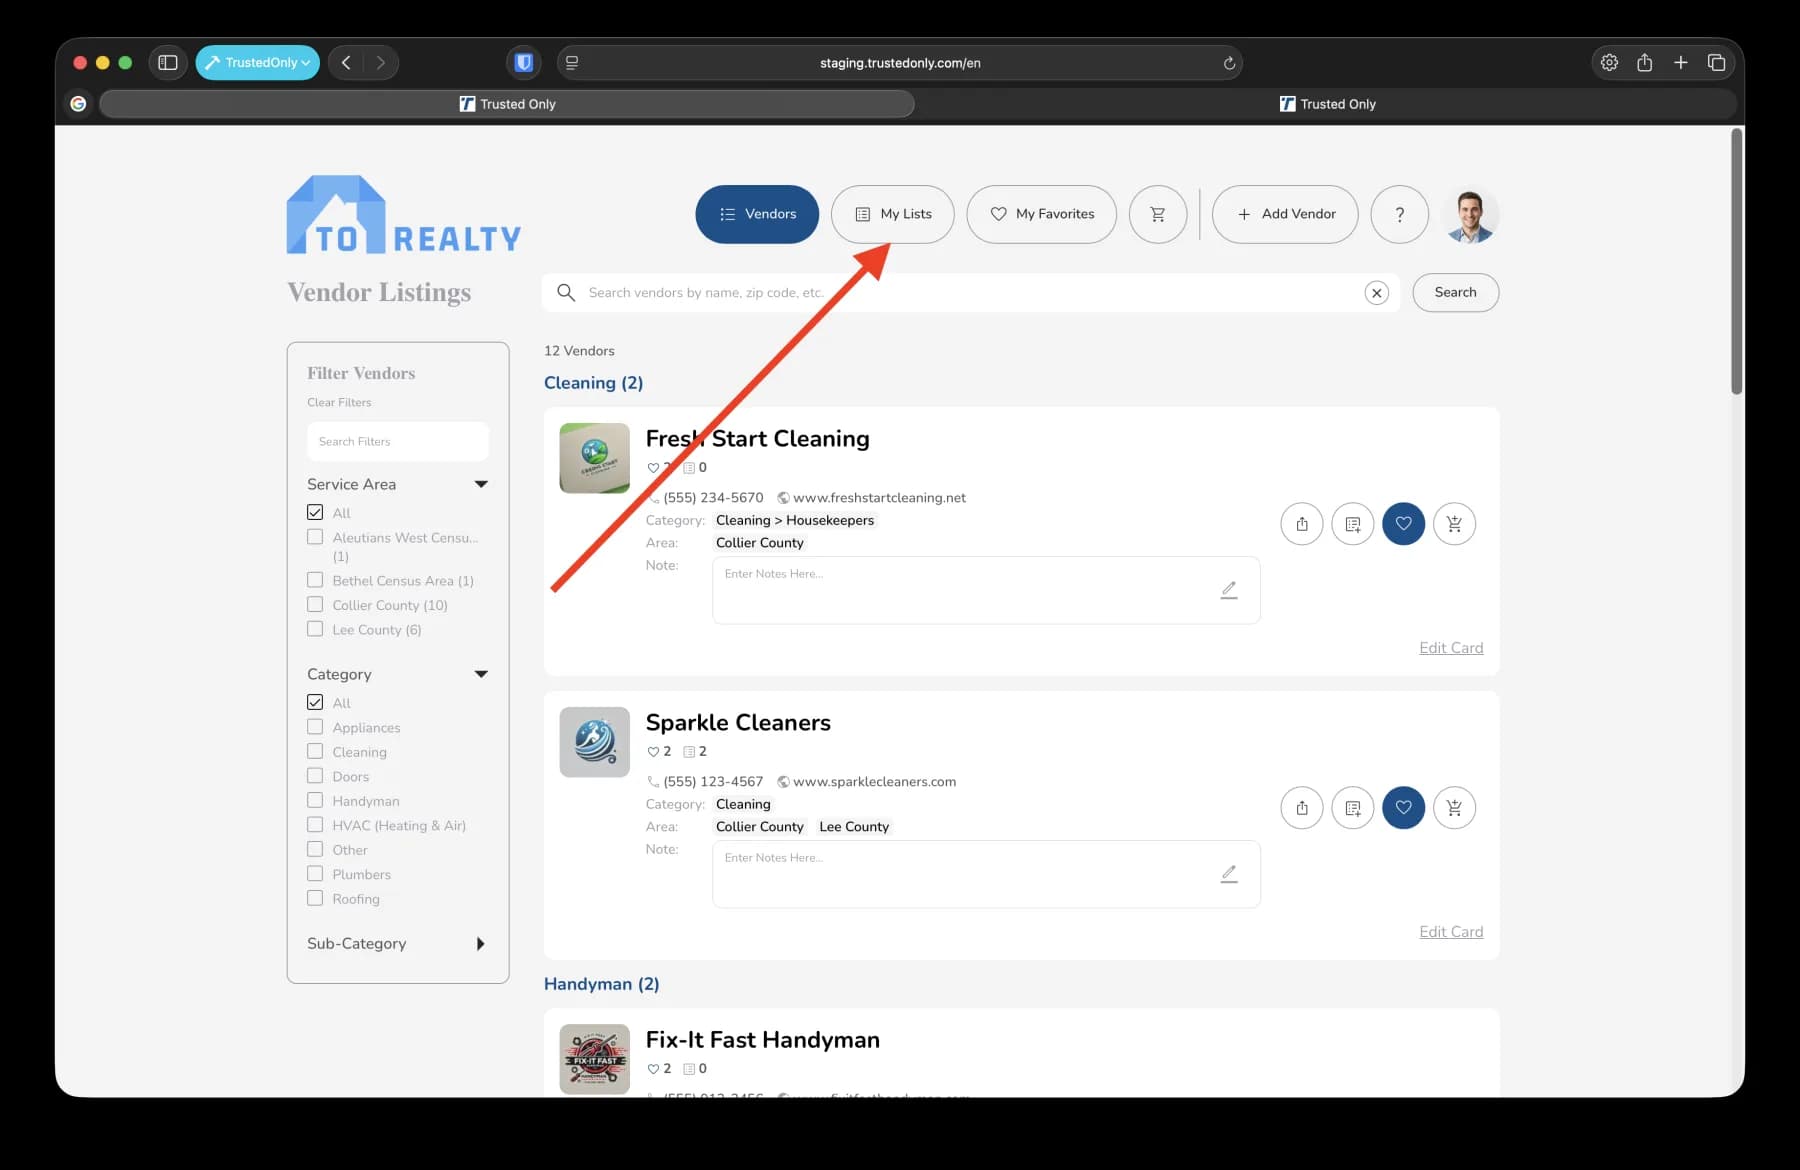
Navigate to the My Lists section in the application.
You will see your created lists displayed.
2. Understanding List Sharing Options
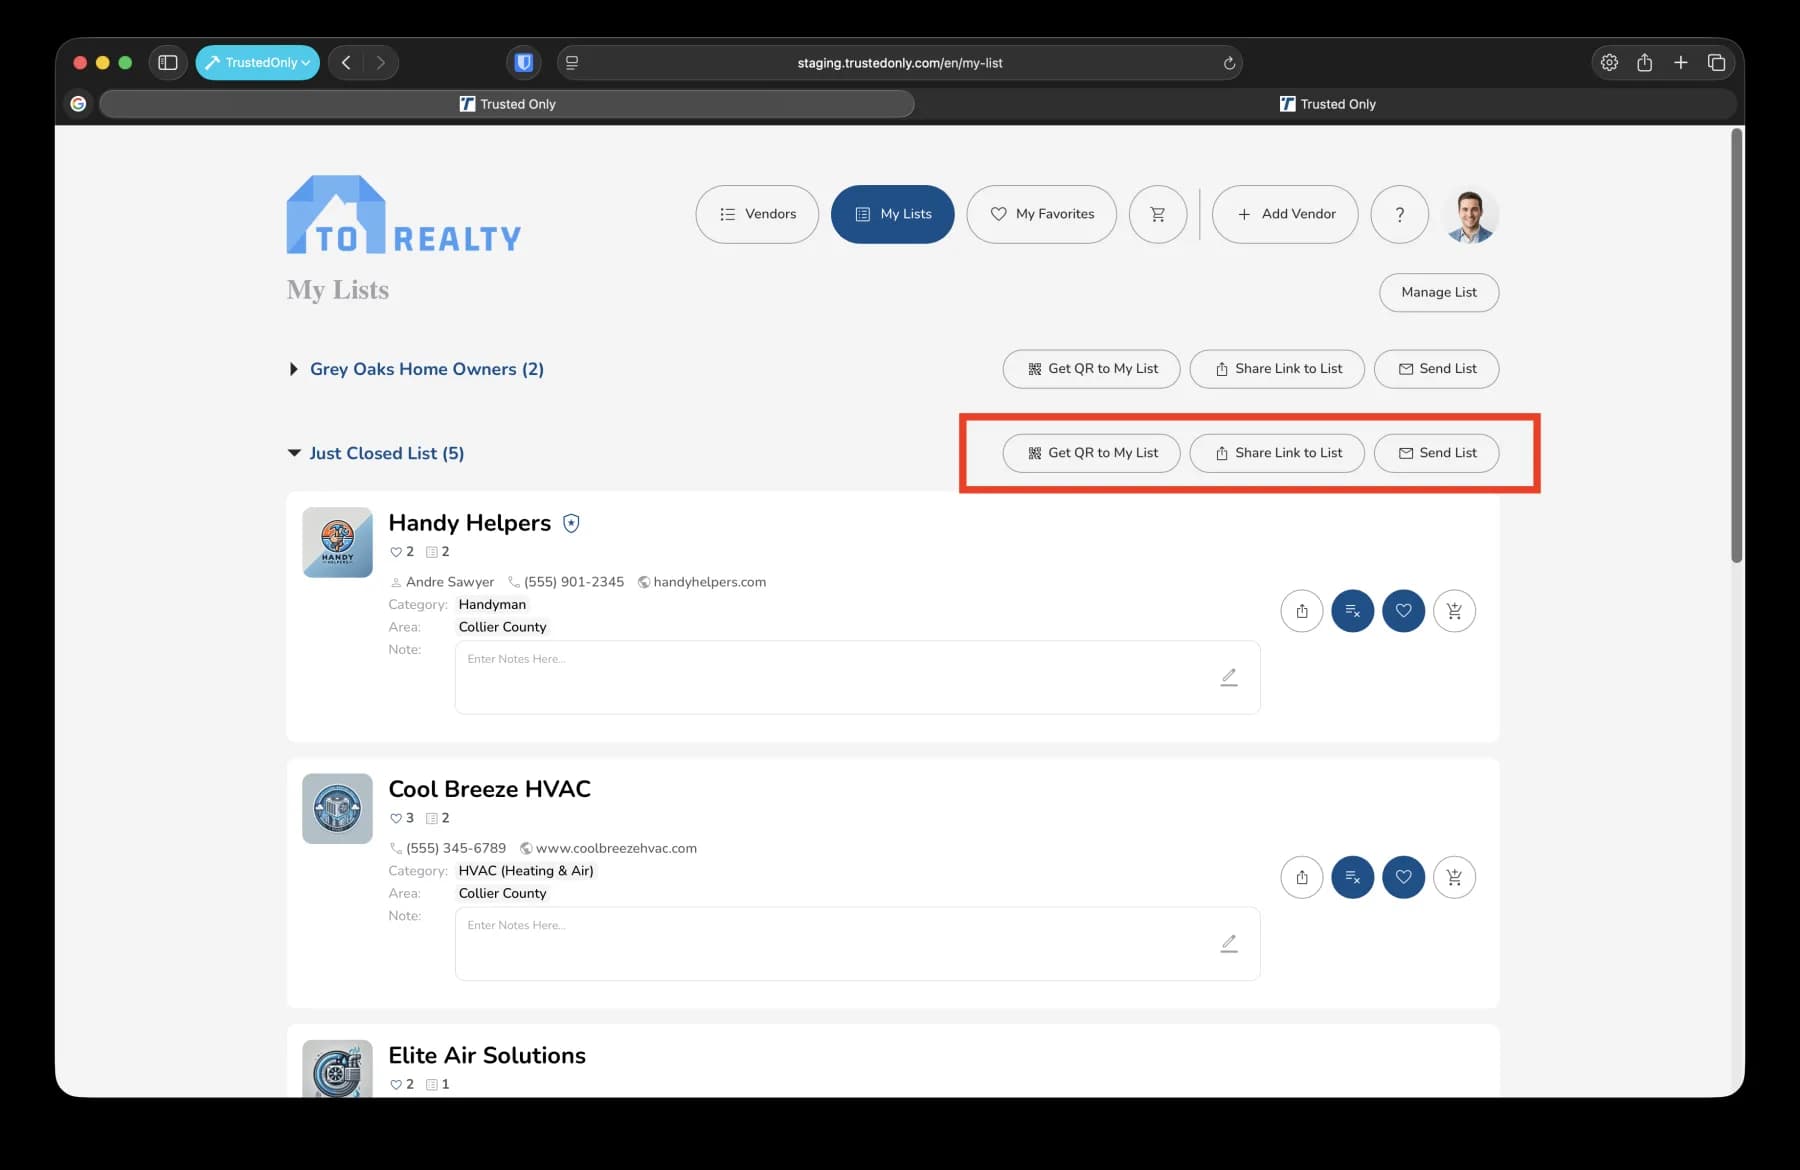
Each list can be shared independently.
Sharing options include:
QR code
Share link
Email sharing.
3. Viewing List Contents
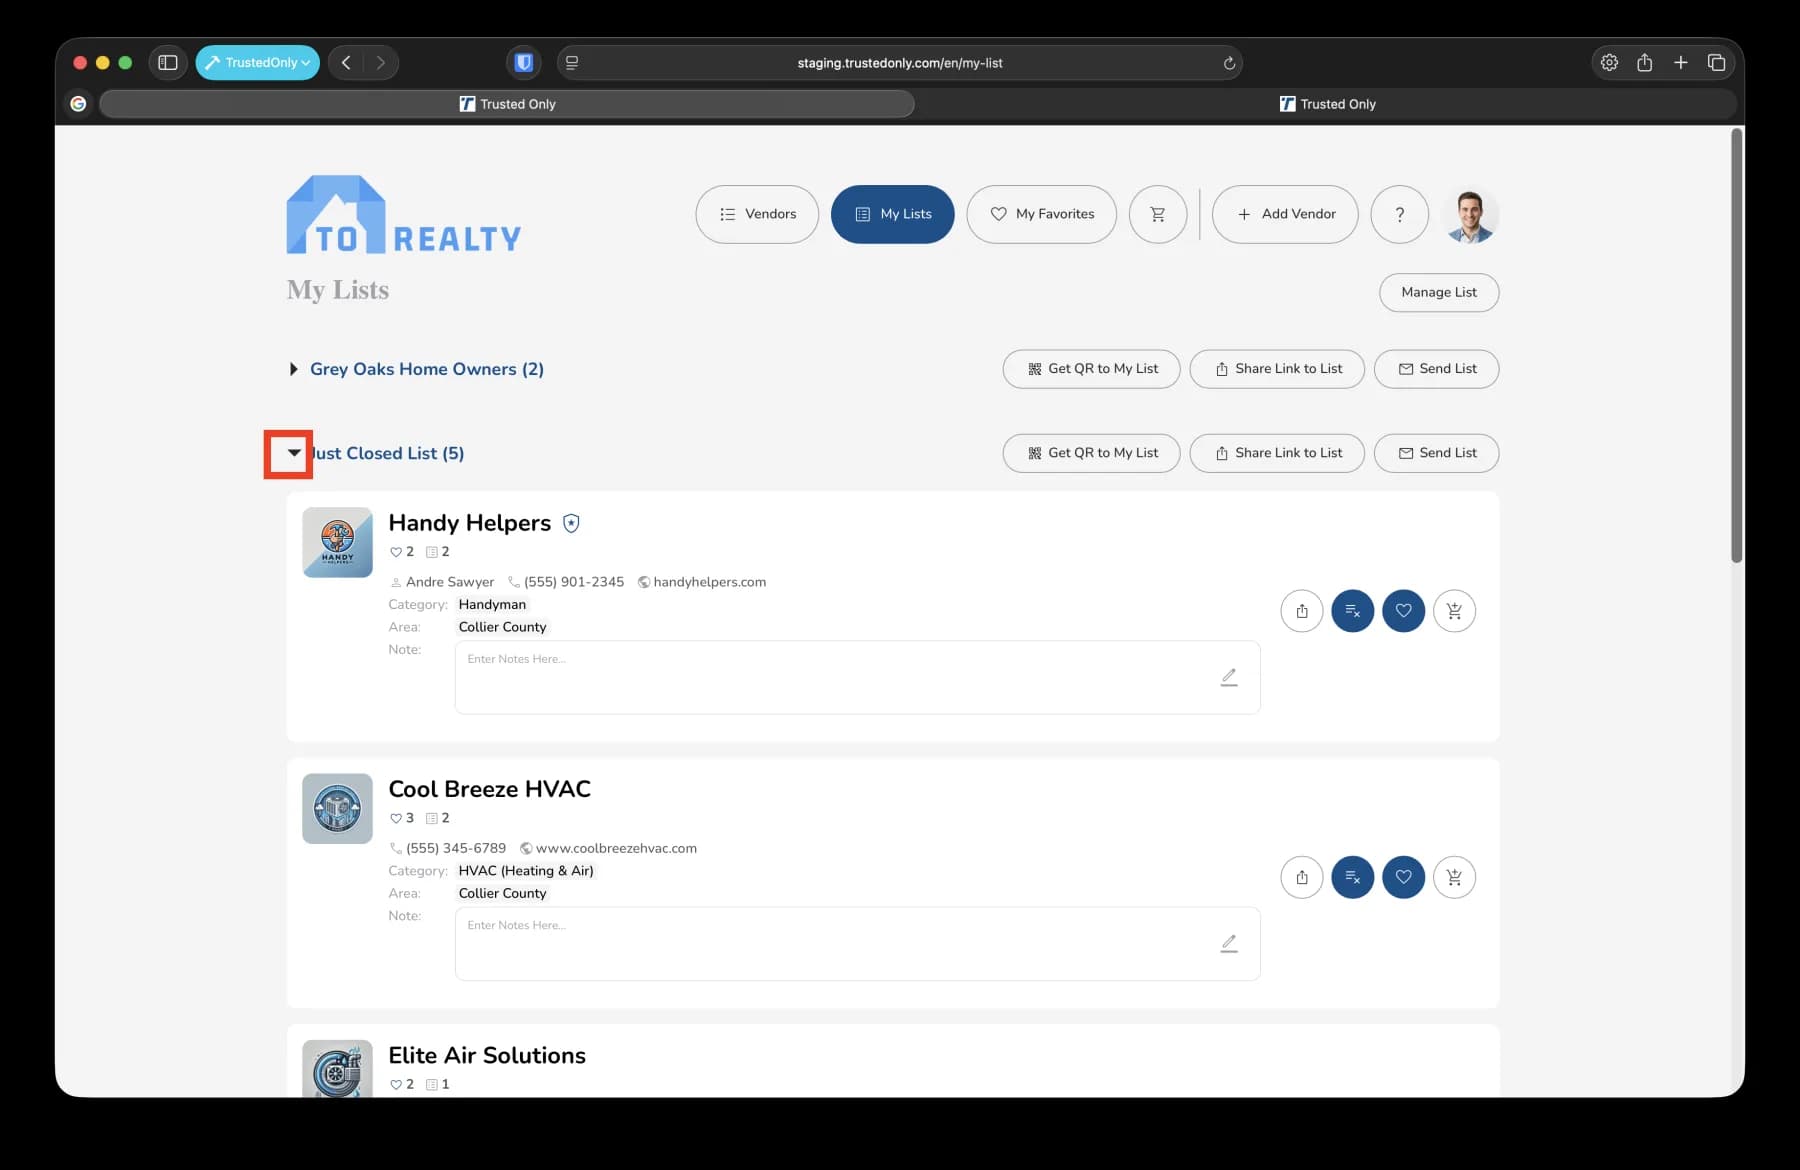
To view the contents of a list, click the arrow next to the list name to expand it.
4. Adding Vendors to a List
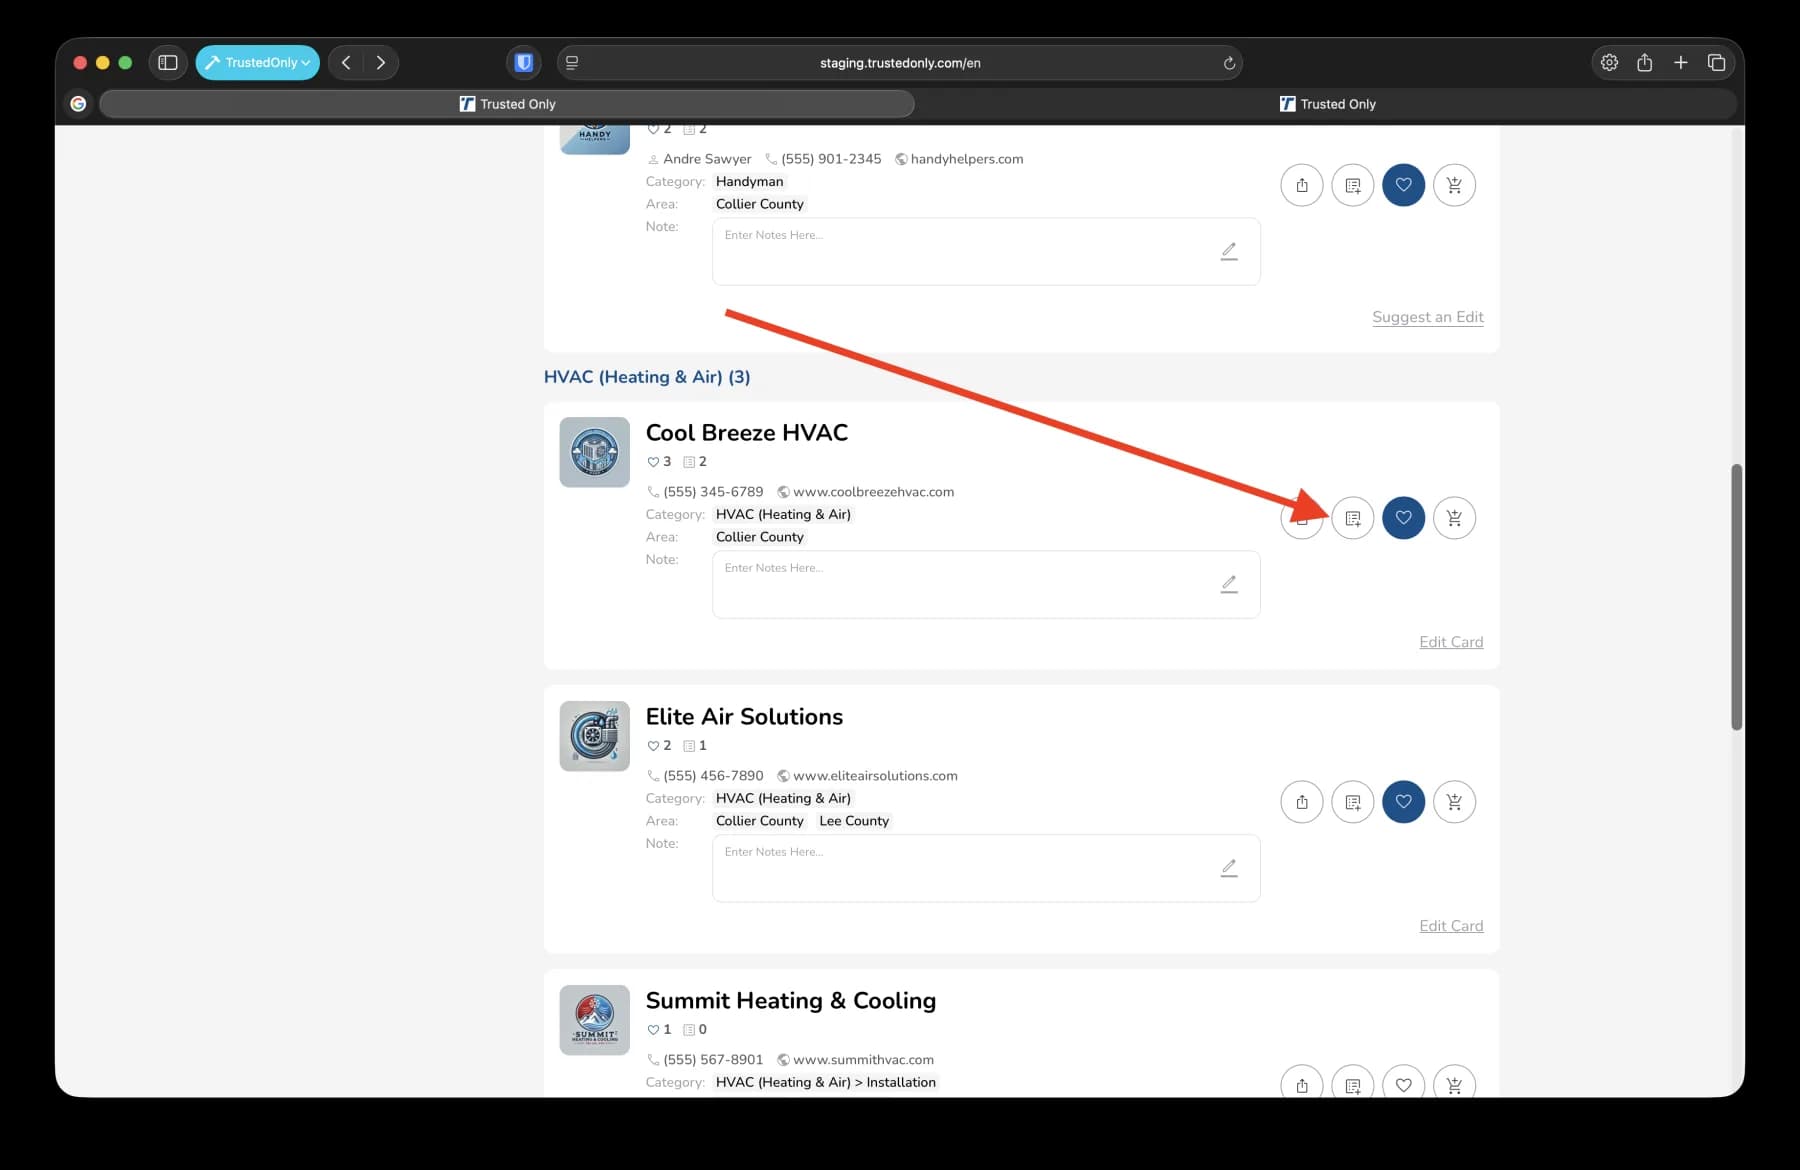
Go to the vendor screen to find a vendor.
Example: Search for 'Cool Breeze HVAC'.
Click the 'Add to List' button.
5. Selecting or Creating a List for the Vendor
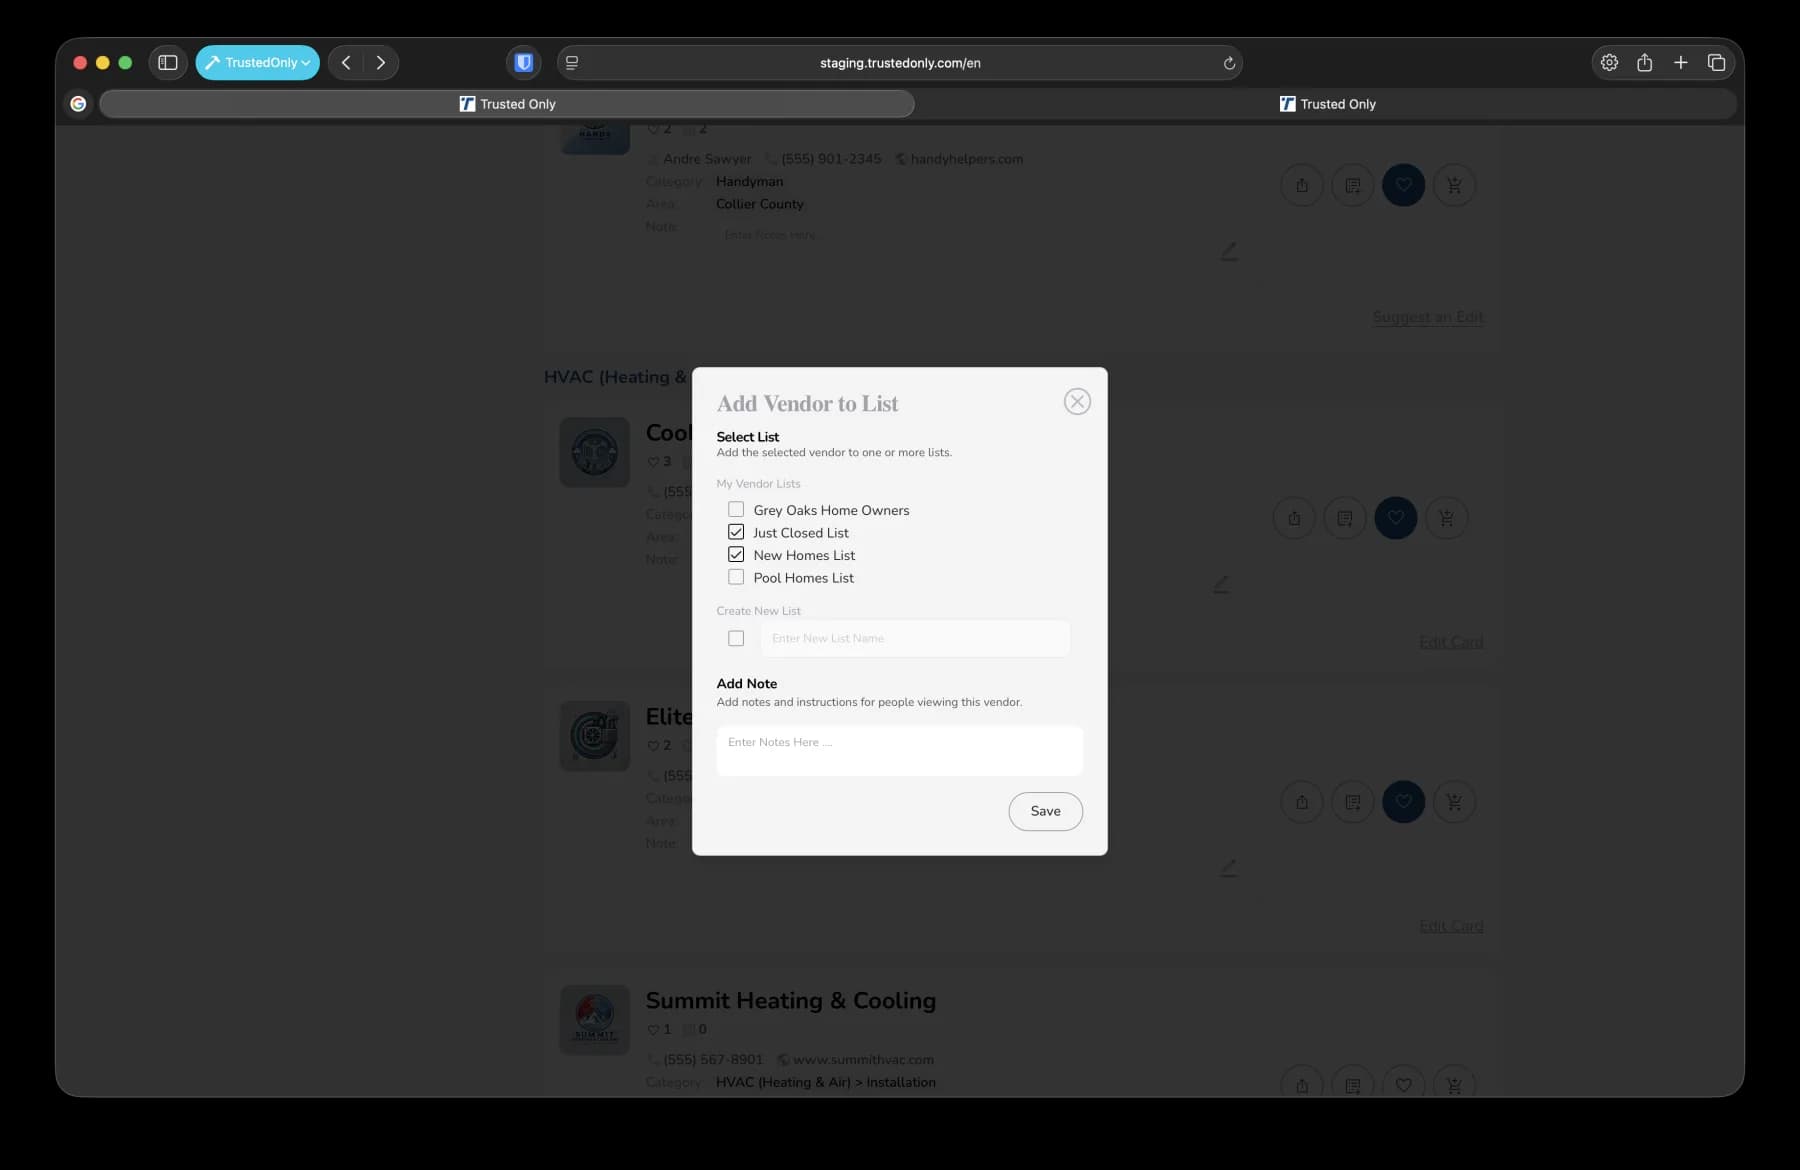
An 'Add Vendor to List' modal will appear.
Select an existing list or create a new one by clicking 'New List'.
If creating a new list, enter a name for it.
6. Adding Notes and Finalizing the Addition
If the checkbox is checked, the vendor will be added to the selected lists.
Optionally, add a note for reference.
7. Sharing a List
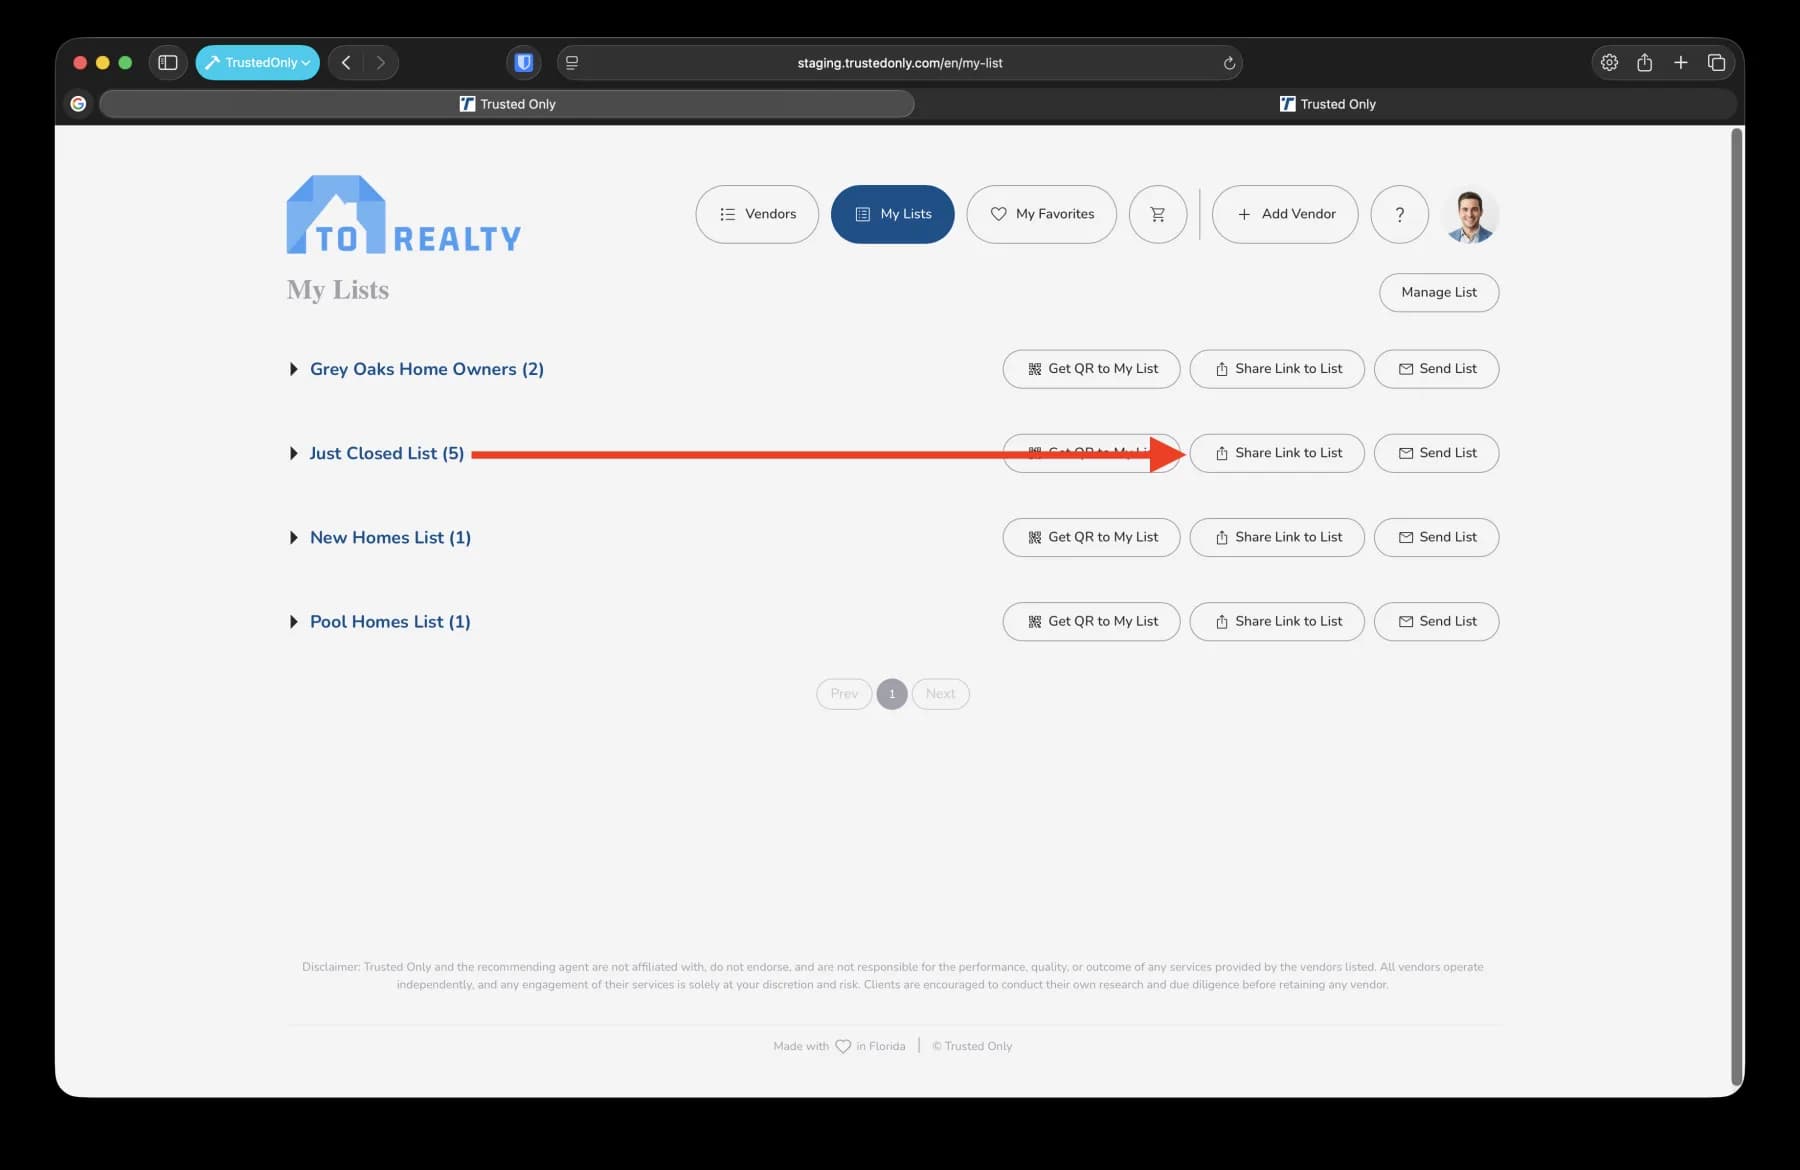
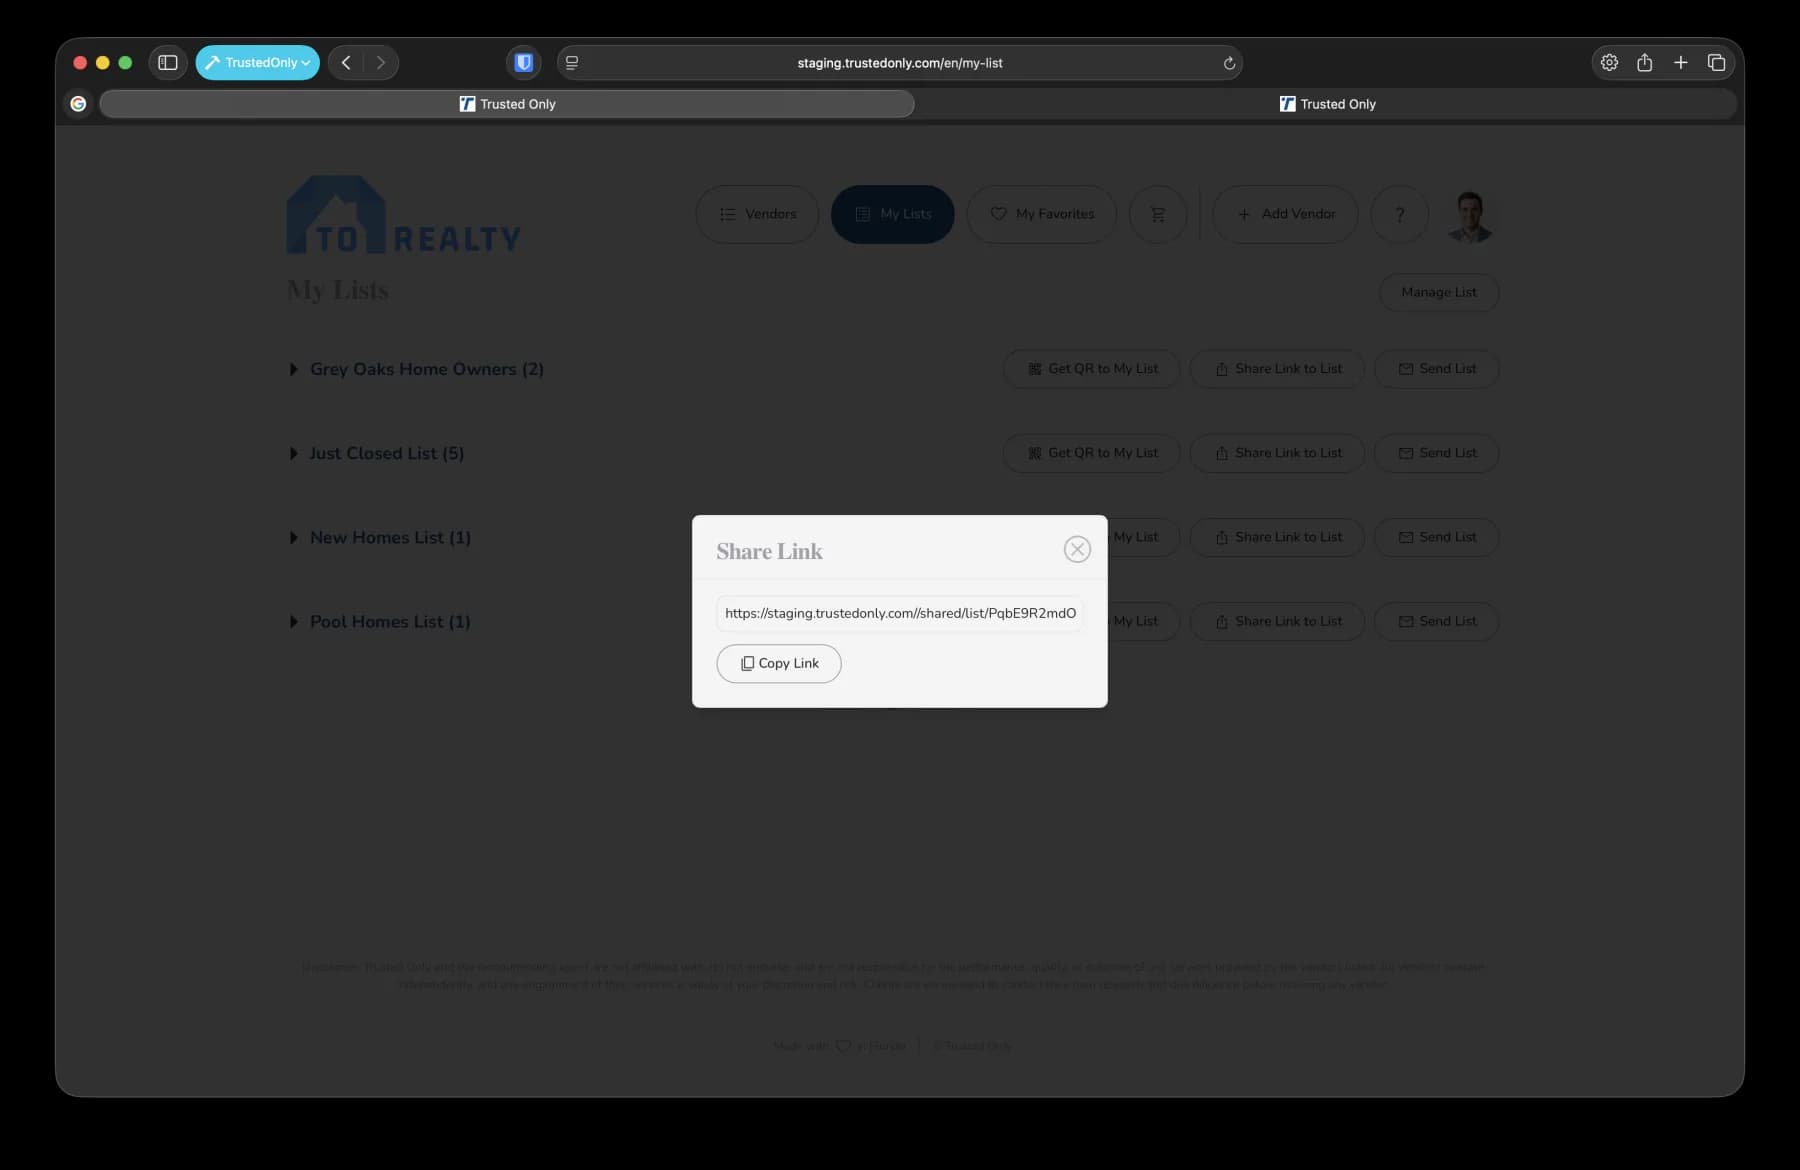
Return to the My Lists section.
Select the list you wish to share (e.g., 'Just Closed').
Click the 'Share Link' button to generate a shareable link.
8. Viewing the Shared List
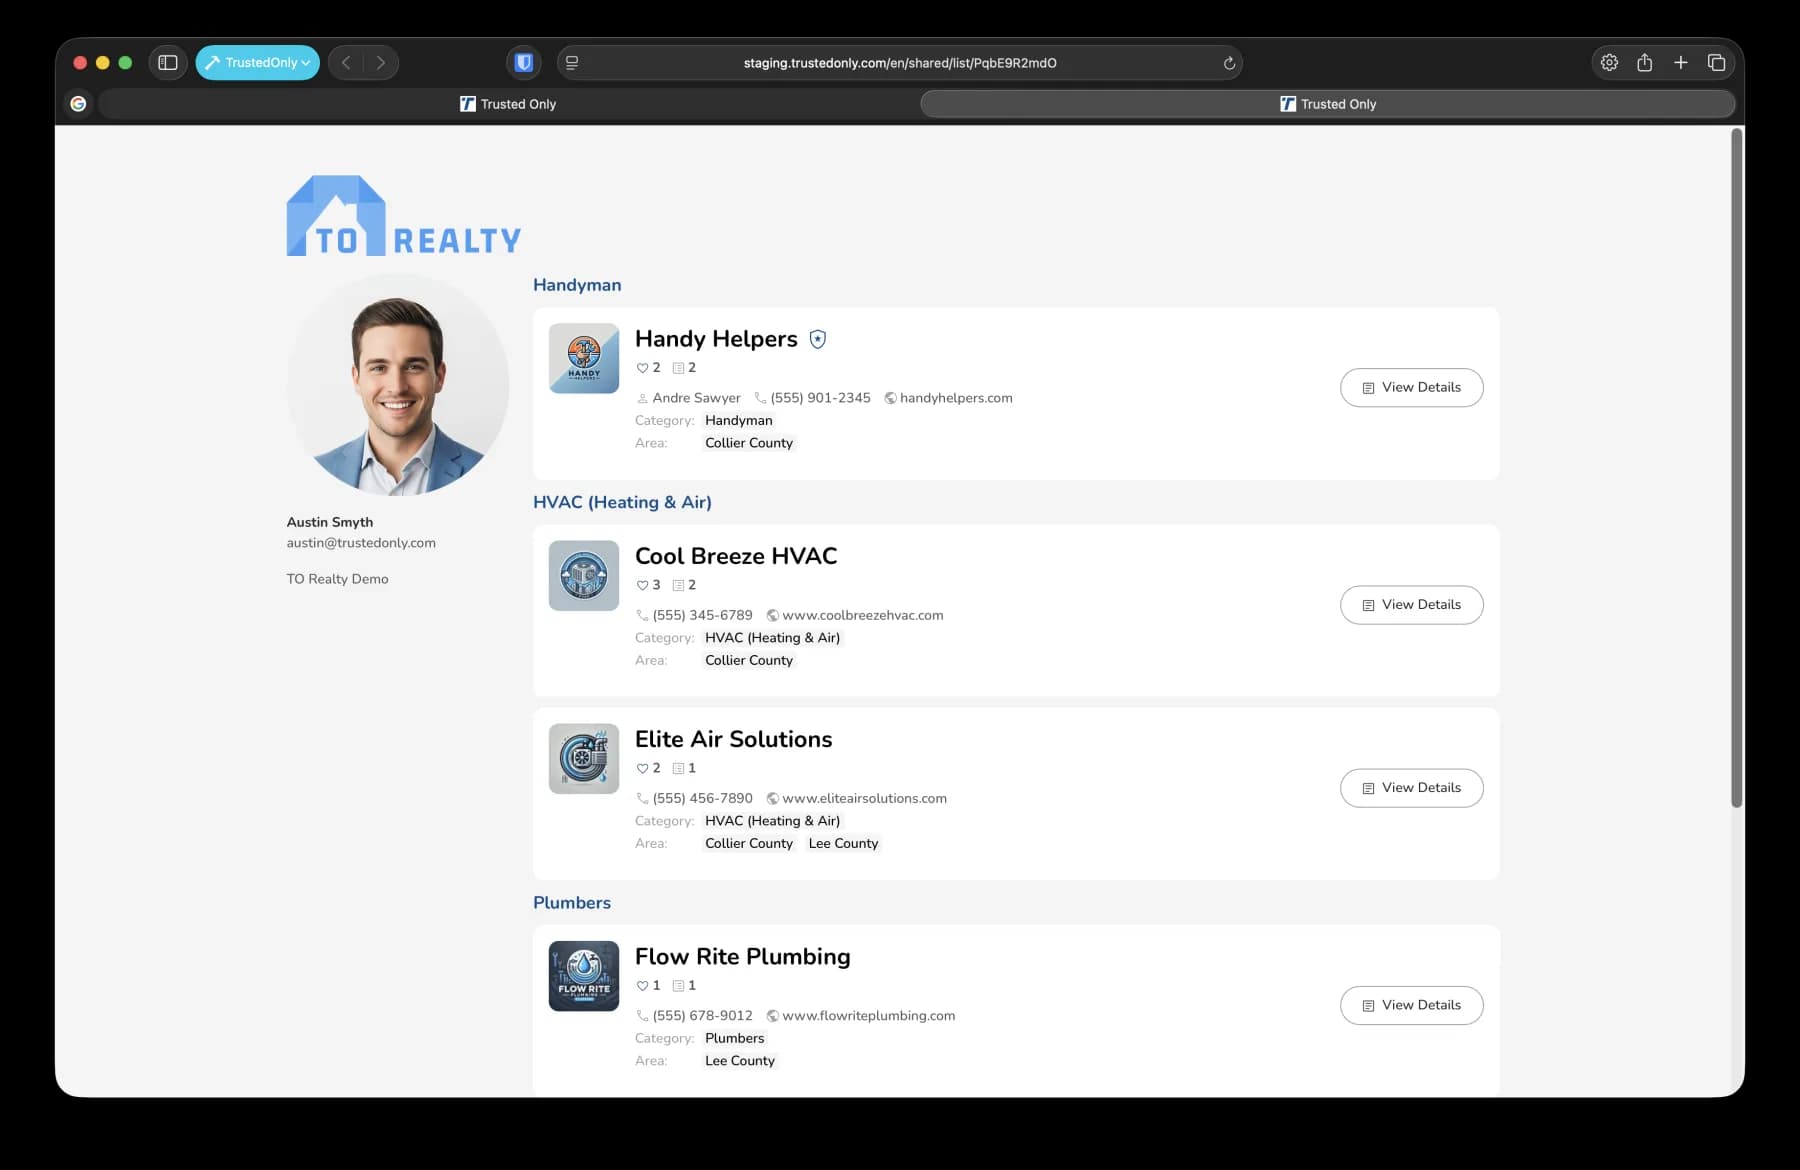
Copy the generated share link to your clipboard.
Open a new tab and paste the link to view how the shared list appears to homeowners and the public.
Was this article helpful?
If you still need help, our support team is ready.